Open Easy III System Utilities. Open System Setup. Select the Data Map you would like to edit. Click on Edit.
Click on the Data Type drop down on the blank channel at the bottom of your Data Map. Select Event Button.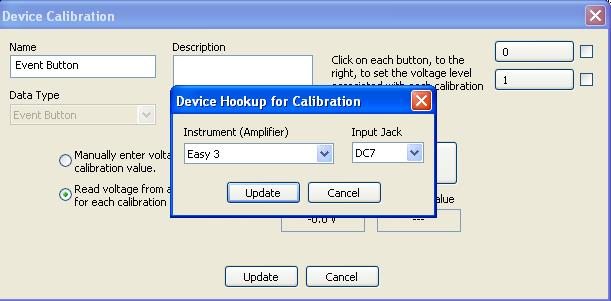
Click on the Device Tab. Click on the DC input you would like to use for the Event Button. This needs to be a DC input not being used by another device in your Data Map. The DC Input Calibration dialog will be displayed.
Look for the Event Button in the list. If the Event Button is not displayed, click on Add. If it is listed, click on the name and click Calibrate.
Type in a name Event Button if not listed. Choose the Data Type of Event Button.
Click on the Device Input Button. Select the Amplifier and DC input you would like to use. Click Update.
Click on Read Voltages from the Attached Device.
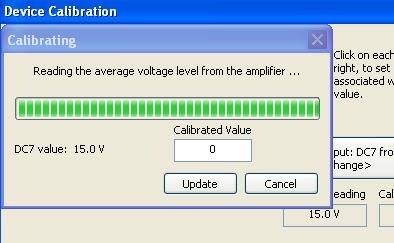 Click on the ‘0’ button in the upper right hand corner. Select OK when you are ready. The input voltage should read 15V. Click Update.
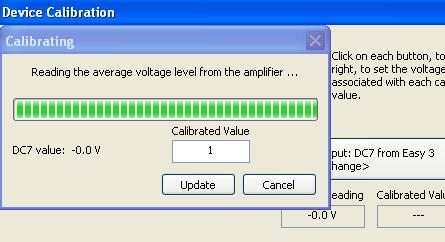
Hold the button down on the Event Button. Click on the ‘1’ button in the upper right hand corner. Select OK. The voltage should equal 0V. Click Update.The ‘0’ button and the ‘1’ button should now have a green check mark next to each button. This indicates that both have been calibrated. Click on Update.
Click Select from the bottom of the DC Input Calibration box.
Edit the Event Button in the Data Map. Select a trace color. Add trace clipping if you want to restrict the Event Button signal amplitude. Click on OK when you are finished and close the 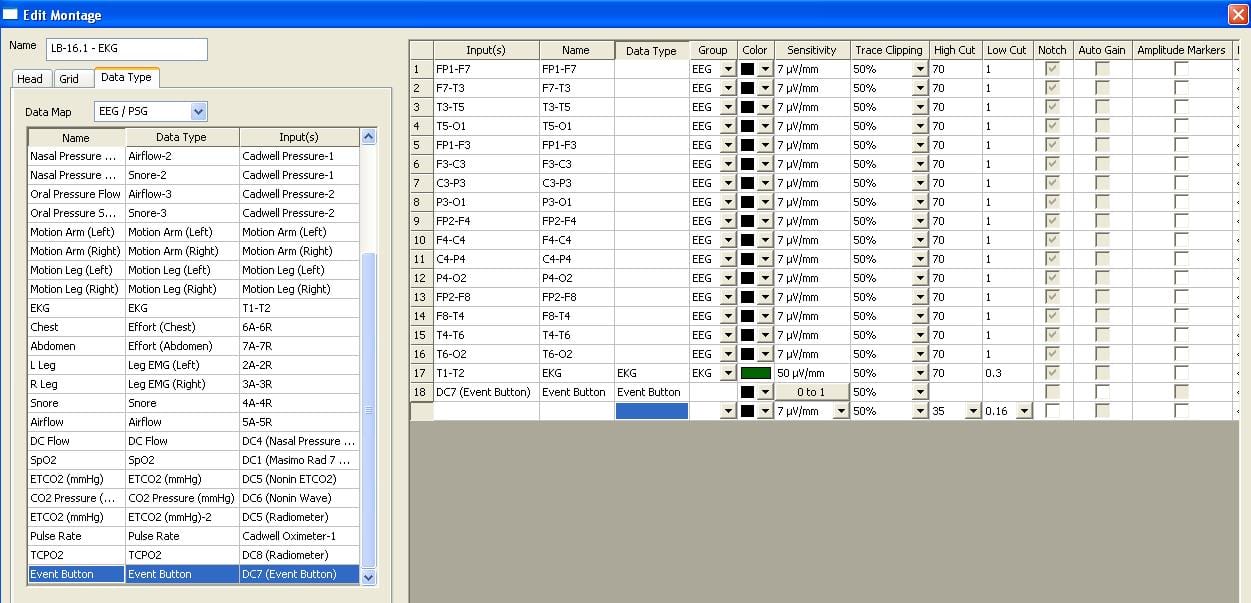
 Edit Data Maps.
Edit Montages within the System Settings dialog box. Add the Event Button channel to selected montage by clicking on the Data Type tab to the left of the montage. Verify that the correct Data Map is being used.
Click on the Input field in the channel row in the montage where you would like to add the Event Button. Click on the Event Button item in the Data Map list displayed on the left side. After clicking on the Event Button, the channel should now be displayed in the selected montage displayed in the right hand panel. Click OK. Close the Montage Editor.
The Event Button is now ready for use. When the Event Button is depressed, the Easy III software will detect the Event. The Event will be added to the trace window and the Event List. It will also mark as a spike in the Event Button channel.