Starting an Easy III Recording
1. Prepare your patient according to laboratory protocol.
2. Verify electrodes and sensors are plugged into the correct connectors.
3. Verify the amplifier is connected and ready for use.
4. Start a record by selecting the Easy III Record Data shortcut on the desktop.
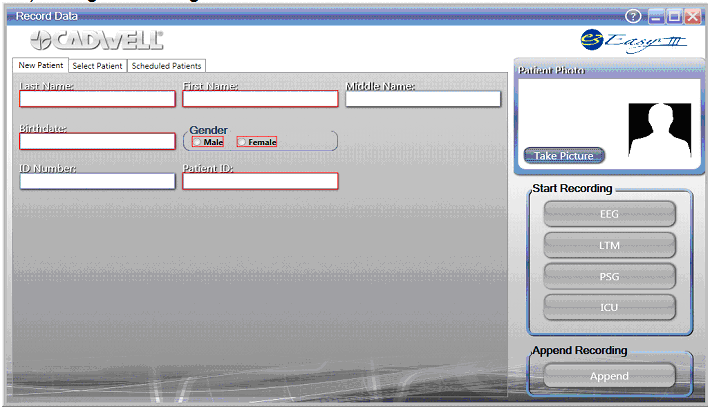
Entering Patient Information into the New Patient Tab
Select this tab to enter new patient information. The patient data fields with the red rectangle box are required fields. Complete each field.
Take Picture – If you have a camera attached to your Easy III system, you can take a picture of the patient.
Start Recording – After you have entered the required patient information, you can click on the recording modality (EEG, LTM, PSG, or ICU) to begin recording.
Selecting a Patient from the Scheduled Patients Tab
Select this tab to select the name of a patient that is scheduled to have a recording at your facility. The list of patients displayed on this tab is comprised of patients added to the Cadwell Scheduler or received from the Cadwell HL7 Link application.
Note the list of scheduled patients can be sorted by all patients, this month’s patients, this week’s patients, or today’s patients.
Take Picture – If you have a camera attached to your Easy III system, you can take a picture of the patient.
Start Recording – After you have entered the required patient information, you can click on the recording modality (EEG, LTM, PSG, or ICU) to begin recording
Displaying Patient Information after Starting a Recording
The information displayed in the Current Patient Info dialog below will be displayed after starting a recording. By default, you can configure Easy III to show (or not show) the patient information when starting a recording. You can edit the information below any time during or after data collection.
Click on OK to close the patient information dialog.
To start a recording, click on the start button.
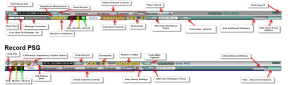
Easy III Toolbar Options
Checking Impedance during Data Collection
The Easy III software will evaluate all inputs displayed in the impedance dialog during impedance measurement. When the impedance dialog is opened, Easy III will test the EEG inputs, then the reference inputs, ground electrodes, and active reference pairs. NOTE: It is important that the user waits at least 10 seconds when the impedance menu is opened. This will allow the program to adequately check all inputs.
NOTE: Waveform data is not recorded during impedance measurement. Check impedance and promptly return to data collection after evaluating impedance levels.
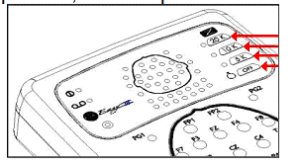
Checking Impedance from the Easy III Amplifier
• On the amplifier, press the 20K button while recording to check impedances greater than 20 kilohms. Press the 10K button to check impedances between 5 and 20 kilohms. Press the 5K button to check impedances below five kilohms. Each time an impedance button is pressed, all the impedance LEDS on the amplifier that is less than or equal to the kilohm level of the button pushed will light up.
• The Impedance-Live window will open in the Easy III software when the impedance button is pressed during recording.
• Press the OFF button on the amplifier to stop impedance measurement. If the OFF button is not pressed, the Easy III software will stop measuring impedance when the maximum impedance measurement duration is obtained. The maximum impedance measurement duration is set in the recording protocol.
Checking Impedance from the Easy III Software
Click the Impedance button from the Easy III EEG/LTM toolbar.
Note the illustration below. Impedance levels that are good will be displayed with green background color in the input. In the sample below, the impedance is greater than 20K. Therefore the background color is red.
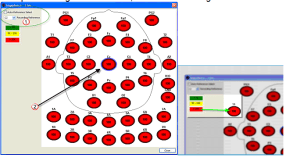
1. Auto-Reference Select – Place a check mark in this box if you would like the Easy software to find the lowest impedance reference electrode for use as a reference electrode. Note: The evaluation and selection of the lowest impedance electrode are only done during impedance measurement. After the reference electrode has been selected and the impedance measurement option is closed, the reference electrode will not be changed unless the impedance measurement option is opened again. The reference electrode can be manually selected by clicking on the drop down Recording Reference option. If a new recording reference is automatically selected, an event will be added to the event list.
2. Note the reference electrode is marked with a blue oval ring around the input. Available Reference Inputs: A1, T3, C3, Cz, C4, T4, or A2.
The Event List
The Event List window summarizes all events associated with a recording. Select a view that includes the event list. If the event list is not included in the current view, press the F2 button to display the event list. Click on a tab to select a specific category. Click on a specific event to reposition to the selected event

Click on an event and click the Delete button to remove it from the Event List.
See Event List Window Setup in Modify Window Settings for setup information.