Applies to “Tina” TCM4 devices as well.
Connect the Radiometer tcpCO2 device to the Easy III Amplifier using any of the 8 DC inputs not already used. Note which number you are plugging which input into.
Note: You should start this sequence from a powered off state so that the sensor is not calibrated in order to get a 0V reading from the device. If the sensor calibrates itself to gas before calibrating the analog output, then you will not be able to get a 0V signal for the low value in the calibration below. Per Radiometer, to get a 0V signal, the device must be put in “Calibration mode”, to do this, go to the Calibration tab on the menu after step 2 on the Radiometer device below. Per Radiometer, going to the Calibration tab will force the system to send a 0V signal, but we have not been able to validate this yet. Also, in some cases, we had better experience sending the low voltage signal with the device entirely powered off.
Open Easy III System Utilities
- Click System Setup, click Data Map, find the Data Map that you want to add/calibrate tcpCO2 on and click Edit.
- Check to see if there is already an item in the Data Map for tcpCO2. If there is, you can click the Edit DC Input Calibrations button and continue to Step 3.
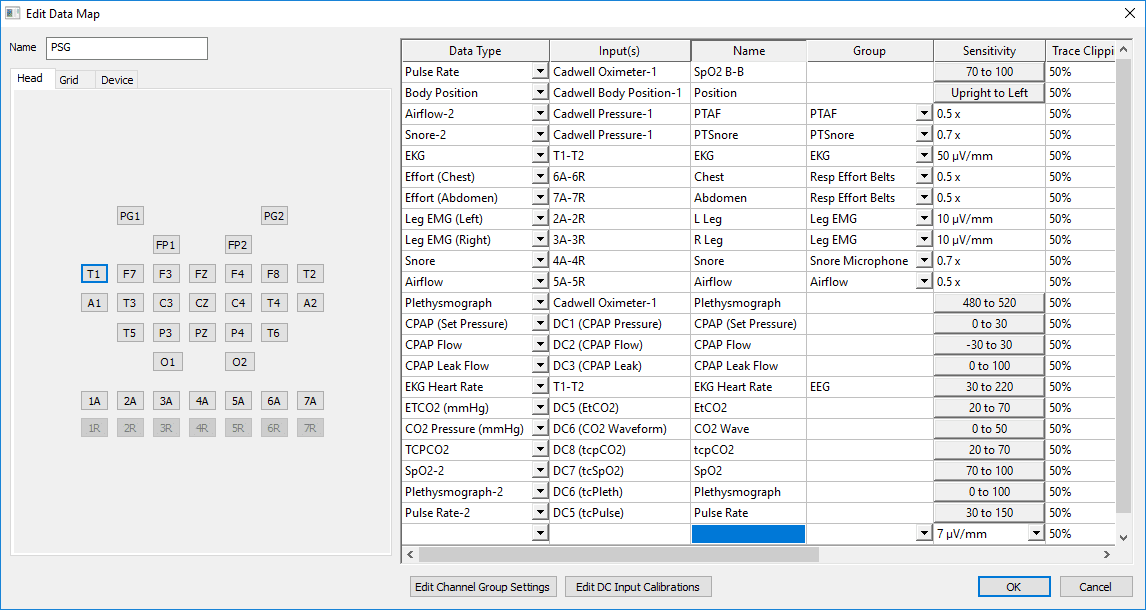
- If there is no entry for tcpCO2 in the Data Map, click the drop-down arrow on the empty bottom line, scroll down and select TCPCO2:

- Click on the button labeled Edit DC Input Calibrations.
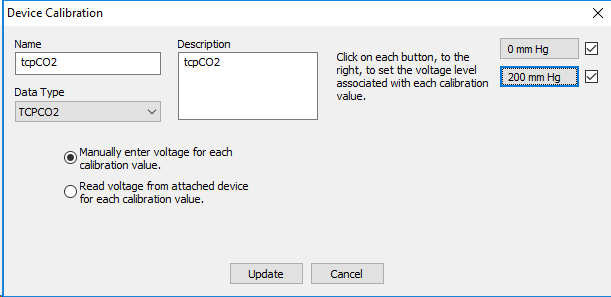
- In the window labeled DC Input Calibrations, either select the channel with the tcpCO2 data type from your list and click Calibrate or click the Add button, type tcpCO2 in the Name field if it isn’t already there and use the drop down under Data Type to pick tcpCO2.
- Check that the device is set to 0 mm Hg and 200 mm Hg on the right side of the window.
If not, click on the button that is incorrect and change the Calibrated Value to the desired reading.
This must be done before the next step. - Click on the button labeled Read voltage from attached device for each calibration value. There can be a short pause while the software connects to the amplifier after you click this button, this is normal.
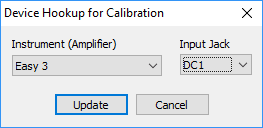
- Click on the button to the right that is labeled with Device Input.
- Change the input jack in the drop down to the DC Input that you have tcpCO2 connected to on the Easy III Amplifier. You need to choose a DC Input not being used by anything else in your Data Map.

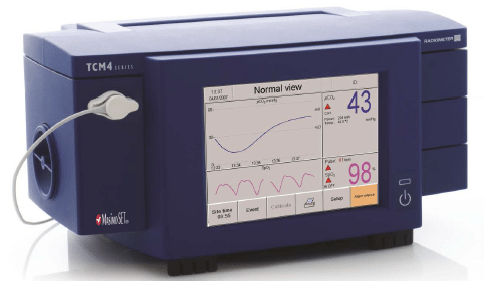
On the Radiometer TCM:
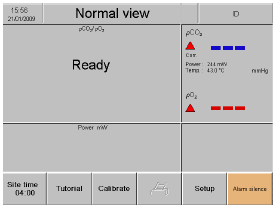
- Turn on the device by pressing the power button on the lower-right side.
- Once the device starts up, press the Setup button on the touchscreen, it is at the bottom-right of the screen next to Alarm silence.
- On the Setup menu, touch the tab for Technical at the top-right.
- Enter the passcode: 19100, then touch “Enter”.
- Touch the “Service Menu” button.
- Check the “Timeout in setup disabled.”
- Touch the “Analog output” in order to check the box, Touch “Apply”. The device is now sending a 1 V signal.
In Easy III:
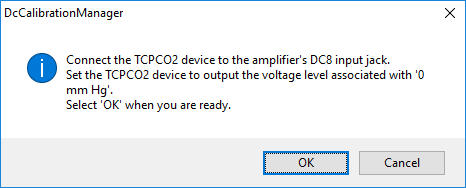
- Click on the button in your Device Calibrations that is labeled 200 mm Hg. A DcCalibrationManager window will appear asking you to connect and if you are ready. Click OK.
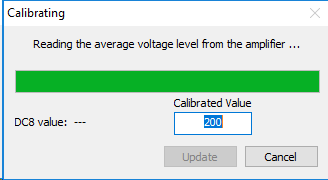
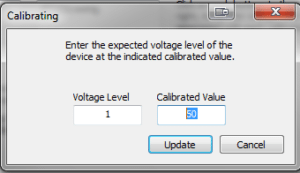
- A Calibrating window will appear and a bar will move across. The Calibrated Value box should show 200. Click on the Update button when it appears.
- On the Radiometer TCM, uncheck the “Analog output” checkbox by touching it again. Touch “Apply”. The device will now send a 0 Volt signal. If you see voltage in this step, see note above about starting the analog output calibration prior to the sensor calibrating itself.
- Click on the button in your Device Calibrations that is labeled 0 mm Hg. A DcCalibrationManager window will appear. Click OK.
- A Calibrating window will appear and a bar will move across. The Calibrated Value box should show 0. Click on the Update button when it appears.
- On the Radiometer TCM, be sure that “Analog output” is unchecked and uncheck the “Timeout in setup disabled” by touching it, then touch OK.
- Click Update at the bottom of your Device Calibration window.
- Click OK to close the DC Input Calibrations box.
- Click OK at the bottom of your Edit Data Map window. Click OK at the bottom of the Edit Data Maps window.
- After calibration and adding to your Data Map, you will need to add the channels to any montages you would like to see them in. From within the Edit Montage, you will now find your new entries for tcpCO2 on the Data Type tab.